Greenhouse diy: How to Build One Step by Step
How to build a DIY greenhouse step-by-step—materials, construction tips, and sustainable growing techniques for home gardeners.
Dedicated garden enthusiasts often envision a year-round haven for nurturing their beloved plants. However, creating an ideal greenhouse for robust plant growth isn’t a task for the inexperienced.
Building a greenhouse entails much more than assembling a basic structure with a protective covering in your garden. It demands meticulous planning, the use of suitable materials, and the incorporation of vital elements to ensure your plants thrive. For example, while plants require abundant sunlight, proper ventilation is essential in greenhouses to avoid overheating during the warmer months.
If you’re prepared to embark on the journey of constructing your own greenhouse, this comprehensive guide is here to offer you invaluable recommendations and essential tips.
Considerations for Greenhouse diy Construction
Before embarking on the construction of a greenhouse, it’s crucial to ponder the following inquiries:
- Freestanding or Attached: Do you prefer a freestanding greenhouse or one that’s attached to an existing structure?
- Sunlight Assessment: How much sunlight does your yard receive throughout the day?
- Climate Evaluation: What is the prevailing climate in your area? Are you dealing with extreme temperatures or seasonal variations?
- Bedding Choices: Are you planning to use in-ground beds, raised beds, or containers for your plants within the greenhouse?
- Space Requirements: Determine the amount of space you need to accommodate your gardening aspirations.
- Materials and Tools: Identify the necessary materials and tools for your greenhouse project. Are you comfortable with building from scratch, or would you prefer a greenhouse kit?
Once you’ve addressed these questions, you’ll be well-prepared to construct a greenhouse diy that perfectly suits your gardening needs.
Building a Greenhouse diy: 5 Step Guide
Curious about the process of constructing a greenhouse diy? Follow these five steps for guidance:

Step 1: Choose an Optimal Location
Selecting the right location is paramount. Your greenhouse thrives when it enjoys ample sunlight, proper drainage, and convenient access to water and electricity.
Sunlight:
Ideally, position your greenhouse in the southern or southeastern part of your property, as this area typically receives the most sunlight from November to February. The eastern side of your property is the next best option, while the northern side receives the least sunlight.
Depending on your greenhouse’s intended use, it’s crucial to consider that most plants require approximately six hours of direct sunlight, which is particularly important for herbs.
Effective Drainage
Proper drainage is equally essential to prevent your greenhouse from becoming muddy and slippery. In addition to regular rainfall, excessive watering of your plants can lead to oversaturation and potential damage to the greenhouse floor.
Choose a location for your greenhouse where you can implement a reliable drainage system. This system will divert excess water away from the greenhouse, ensuring the surrounding area remains dry.
Access to Electricity and Water
Naturally, when you’re in the process of learning how to construct a greenhouse, it’s vital not to overlook access to electricity and a water supply. Greenhouses require some form of heating, especially during colder months.
You might consider transferring heat from your home to an attached structure. Alternatively, an electrician can wire an independent greenhouse to provide precise temperature control.
Moreover, ensure that your water supply reaches the greenhouse for consistent irrigation. This could be achieved through a hose or the installation of a ceiling-mounted sprinkler system.
Step 2: Choosing the Structure
Determine the dimensions of your greenhouse structure, including the planned layout for garden beds, storage areas, and pathways. A small greenhouse should suffice for cultivating herbs and a few vegetables or flowers.
Greenhouse Kits
If you have limited construction experience, opting for a greenhouse kit can simplify the process significantly. You can find these kits at home improvement stores or online, offering both basic and more robust options.
The price range for greenhouse kits typically falls between $300 and $19,450, depending on factors such as size, design, and additional features.
It’s important to note that incorporating electricity into your greenhouse will incur extra costs. To make an informed choice, carefully assess your requirements and conduct thorough research to select the greenhouse kit that aligns best with your gardening objectives.
Step 4: Material Selection
Choosing the right materials for your greenhouse primarily depends on factors such as your local climate, budget, and the specific plants you intend to cultivate.
Consider the following aspects: Does your area experience severe winters? Are you working with a limited budget? Additionally, think about factors like light transmission, energy efficiency, and the lifespan of the materials.
Cover
When it comes to the greenhouse cover, your options include acrylic, fiberglass, polyethylene, polycarbonate, and single- or double-pane glass.
Acrylic covers, while relatively expensive, offer exceptional light transmission, durability, and resistance to extreme weather conditions. They are also lightweight and visually appealing. In contrast to glass, acrylic is less fragile and longer-lasting.
Framing
The choice of framing materials is equally crucial. Aluminum framing is lightweight, easy to work with, and boasts longevity, making it one of the best options for greenhouse framing.
However, it conducts heat more than other materials. Wood, steel, and PVC are also popular choices, although wood and PVC tend to deteriorate over time when exposed to the elements, unlike steel.
Flooring
For the greenhouse flooring, you can consider materials such as concrete, vinyl tile, or gravel. Vinyl tiles are a convenient choice due to their ease of installation, waterproof nature, and simple cleaning process.
However, if you are on a tight budget, gravel is an excellent option with excellent drainage properties and a friendly impact on your wallet.
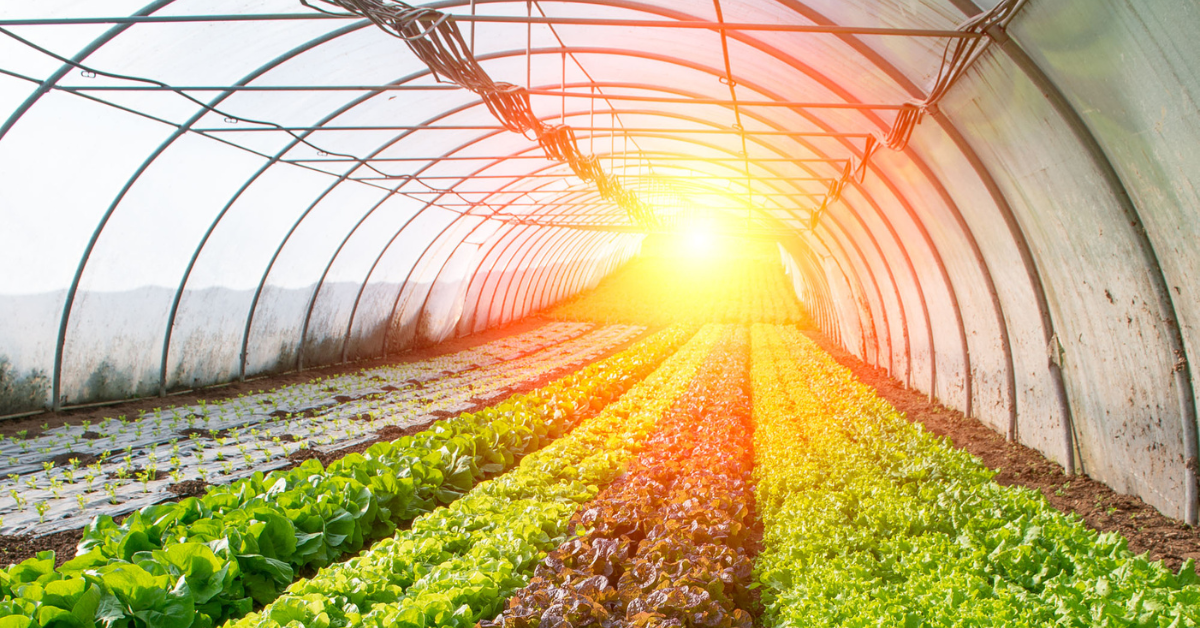
Step 4: Ensure Temperature Management
Irrespective of the materials used, your greenhouse will experience temperature spikes when the sun shines directly on it during the day. This can lead to your plants wilting and drying out over time.
During heatwaves, the greenhouse temperature can surge by 10° to 20° Fahrenheit compared to other times, necessitating the installation of fans or windows to facilitate cross ventilation.

Even in the winter, introducing outside air is essential to reduce the risk of fungal growth. Fungi thrive in high humidity and condensation, with growth rates soaring by 90%.
For some, achieving precise temperature control in the greenhouse may require some trial and error to ensure optimal plant health. However, there are tools and strategies available to assist in this endeavor.
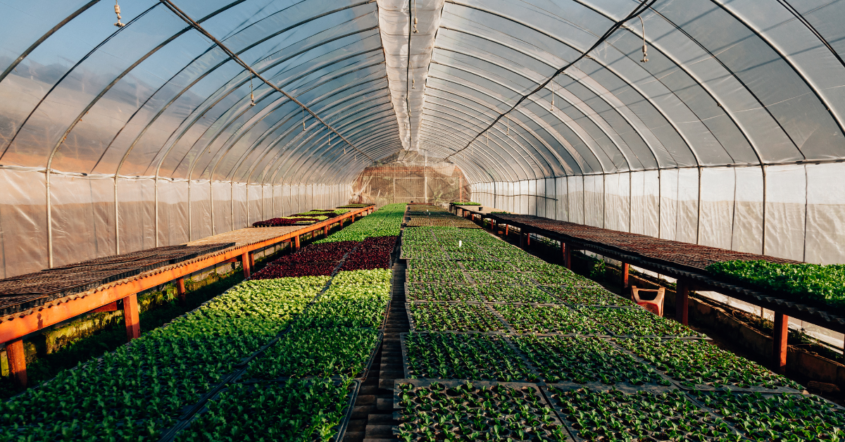
Step 5: Plan Your Interior Layout
After completing the construction of your greenhouse, it’s time to plan the interior layout and commence your gardening endeavors. Arrange your garden beds and incorporate shelving for potted plants.
Keep in mind that companion planting is beneficial for plant growth, enhancing soil fertility within your indoor garden while reducing the likelihood of plant diseases or pest infestations.
Greenhouse plants are often vulnerable to pests like aphids, mealybugs, mites, thrips, and leafminers. In particular, aphids, also known as plant lice, can reproduce rapidly, giving birth to six to ten females per day just a week after their own birth, potentially overwhelming your plants.
Build Your Own Greenhouse
For plant enthusiasts, greenhouses represent a residential luxury that nurtures their love for gardening. If you possess the knowledge of how to build a greenhouse diy, you can enjoy year-round plant cultivation and reap the rewards of your passion.